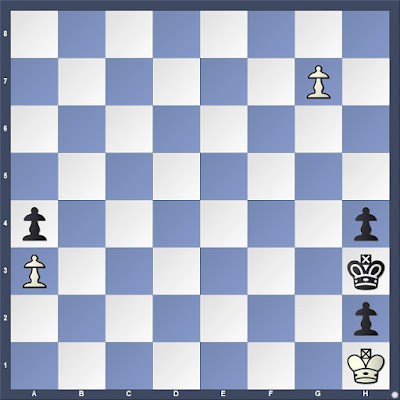
Relative pins are double edged. They can backfire, presenting the player facing the pin with an opportunity. Many of my students the past two weeks have seen this position from a game I played 16 January on Lichess.
White to move
 |
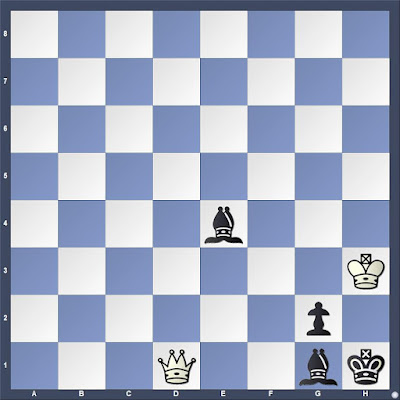
| After 5...Bg4?? |
Evidently I am not the only player who has had this exact position. The position just before I played 8.Qxf7# has been examined in the ChessBase cloud more than 1500 times. Certainly some of the games that could have led to the moves in my game continued 6.Ne5 Bxd1 7.Bxf7#. It seems likely that a few players of the Black pieces also would have found 6...Be6 (the best choice after White exploits the bad pin).
Years ago, perhaps 1999, I bought and began reading Georges Renaud and Victor Kahn, The Art of the Checkmate, trans. W. J. Taylor (1953). I wrote about this book and how it first came to my attention in "Checkmate Patterns) (2015) and again in "Learning Checkmate (Or Teaching It)" (2021). I am rereading it, now in a new translation that has algebraic notation.
The Art of the Checkmate is my first recommendation when players are looking to learn checkmate patterns. Renaud and Kahn do far more than present basic patterns and then offer exercises. They offer detailed discussion of the variability of the basic pattern and how to bring it about. They use mostly full games. The chapter, "Legal's Pseudo-Sacrifice" (11-21) offers 17 complete games arranged by what they refer to as the "four aspects" of Legal's mate. They explain:
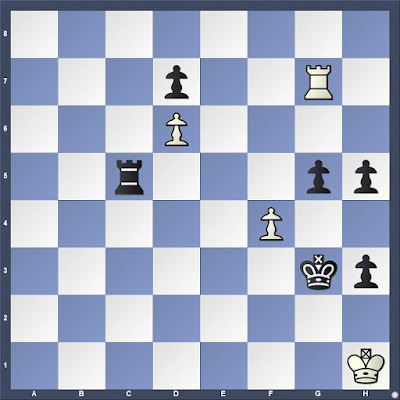
First and foremost we ask you not to learn it by heart but to grasp the precise mechanism, to understand that the bishop on g4 in "hanging", that is to say exposed to capture if the knight moves to threaten mate. But this mechanism appears in many positions as a latent threat and the opponent, if he pins your king's knight, is obliged to take this into account.I missed my chance to show the knowledge I should have acquired from the book in this blitz game played in 1999 on the Internet Chess Club.
The Art of the Checkmate, trans. Jimmy Adams (2015)
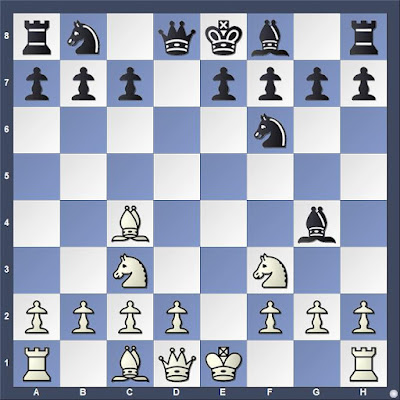
White to move

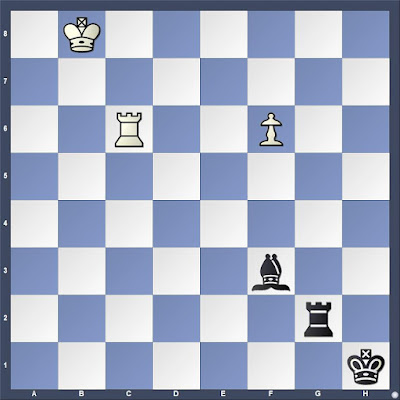
In 2000, I showed further incomprehension by maneuvering my way into the losing side of one of the combinational motifs enabled by "the bad pin".
White to move
7.Bxf7+ Kxf7 8.Ng5+ Ke8 9.Qxg4
White has a decisive advantage and went on to win.
Genesis of the Instruction
It might be a stretch to claim that Renaud and Kahn invented the genre of checkmate pattern books. The manuscripts of Gioachino Greco, and many books grounded in these manuscripts offer more in the way of elementary checkmates than any sort of positional insight. But, when it comes to naming and classifying checkmate patterns, I know of nothing earlier than The Art of the Checkmate.
In the annotations to Kermer de Légall's famous game in the Jimmy Adams translation, Renaud and Kahn credit Emanuel Lasker with articulating a general principle of open games: "it is not always advisable to pin the opponent's king's knight before he has castled" (the 1953 translation makes no reference to Lasker). They are referring to lectures Lasker presented in London in 1895 and which were later published in outline as Common Sense in Chess (1917). I presented "Lasker's Rules" to my students and on Chess Skills in 2013, and then discussed Erik Kislik's (Applying Logic in Chess [2018]) critique in "Knights Before Bishops" (2018). It is notable that Renaud and Kahn qualify Lasker's rules in a manner that anticipates Kislik's critique.
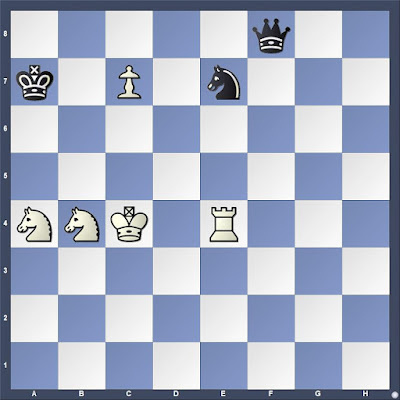
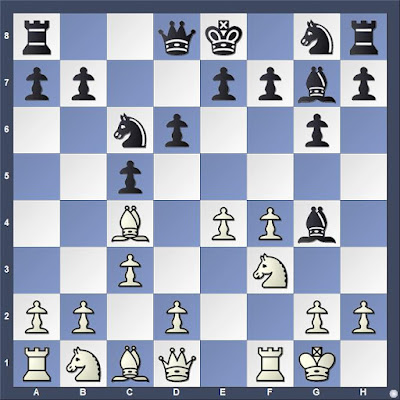
Lasker, Common Sense in Chess presents two short games at the beginning of the chapter. It is not clear that they derived from actual play as all the instances of his two miniatures that I find in the database are relatively recent (late-twentieth century to the present). This position arose in the second.
Black to move

Renaud and Kahn begin with Legall's well-known game. However, the version they offer differs from that found in George Walker, A Selection of Games at Chess (1835). Edward Winter inquired in 2008 about the earliest known publication of Legall's game (Chess Notes 5720, 18 August 2008). Dominique Thimognier has been researching Legall and published some of the results in French at Heritage des Echecs Francais.
The variation presented in Walker is unsound. White blunders with 5.Nxe5. Yet, the Walker variation is the one found in ChessBase Mega 2020. Chessgames.com has the variation presented in Renaud and Kahn, but with White's rook on a1 absent.
Although there is plenty to doubt about the original game, the endless variations of the ideas have appeared in a great many games. Renaud and Kahn explicate the possibilities well.
Practice
I created an interactive lesson on Lichess.org with some instructive games and 20 exercises. The Study is called "The Bad Pin". I may add to it as I find time. Take a look. Let me know what you think.