24 April 2025

Working through Dvoretsky

Dvoretsky's Endgame Manual by Mark Dvoretsky, and now revised by Karsten Mūller, is reputed to be too difficult for most players below master. I was a C-Class player (~1500 USCF) when I bought and started studying the first edition of Dvoretsky's Endgame Manual (2003) the year after it came out. Several years later, perhaps about the time that I became A-Class (above 1800), I created cards for reviewing and training pawn endings--all of the blue diagrams in the first chapter. I would be lying if I claimed that I can instantly play correctly all 48 positions despite many hours with these cards, the print copy of the first edition, and the e-book edition of the second edition. However, I do know well at least 75% of these positions and this knowledge has served me well in many games.

I also created similar cards for the first 24 blue diagrams in the rook endgame chapter. These cards served as prompts for some endgame lessons with some young chess students during the spring break chess camp earlier this month (see "Stockfish's Curve Ball"). My difficulty with some of the positions convinced me that it was time to revisit the rook chapter of Dvoretsky's Endgamne Manual

I do not disagree with those who opine that the book is not aimed at players of my strength. However, I must insist that it depends on how you read. It might take me a month or longer to get through the 24 blue diagrams (now gray in the fifth edition [2020], the one revised by Mūller after Dvortsky's death). Some of my lessons with a student the past year had us working thorough all of the rook endings in Jesus de la Villa, 100 Endgames You Must Know, 4th ed. (2015) and then I worked through all the positions in Thomas Engqvist, 300 Most Important Chess Positions (2018)., which included a fair number of challenging rook endings. I believe that I'm ready for the advanced work in Dvoretsky.

I do not expect to get through the entire chapter on rook endgames. For the time being, however, I am pushing through carefully and slowly. Some days I study one or two positions. I read Dvoretsky's analysis and then practice many of the positions against Stockfish. 

Tuesday, I worked on exercise 9/4. First, I studied the diagram. Then, I set it up on my iPad and studied it longer. The clock started when I made my first move.

Playing against an engine usually presents information that play against humans never reveals. The engine presents its evaluation of the position. 

Black to move
I first considered 1...Ra6, but saw that White would force an exchange of rooks or win my pawn for no cost and leave me in a hopeless position of passive defense against a passed f-pawn.

Then, I considered putting my rook behind the king or the pawn, but saw that would fail.

The key was understanding that my king needed to move to the short side.

1...Kf8!

At first Stockfish on the iPad gave the evaluation as 2.6, but that quickly dropped and after several seconds, settled at 0.1. I knew my move was correct.

2.Rb6 Ra1 3.Rxf6 Kg8

Short side is the only move that holds.

4.Re6 Kf8

Rg1+ is also okay. Occupation of the promotion square should be sought when possible, moving to the short side when forced by checks or mate threats.

5.Rb6 Rf1

Alternately, Black can play 5...Rg1+ 6.Kf6 Kg8

6.Rb8+ Ke7 7.Rb7+

The point of 5...Rf1 was that f6+ would be met with Rxf6+.

8.Rb2

Black to move
Matters remain critical: Black must hold the rook on the f-file, move the king to e7 again, or throw in a check that leads to a mate threat and then retreat to the short side.

8...Rf3 9.Rb8+ Kf8 10.Rb7+ Kf8 11.Rf7+ Kg8 12.Rg7+

Black to move
12...Kh8

This move holds, but the defense might be easier after 12...Kf8. For instance, 13.Rh7 Rg3+ 14.Kf6 Kg8

13.Re7 Rg3+

Only move.

14.Kf7 Ra3

Now, I was forced to return the rook to the long side.

15.Rc7 Ra1 16.Kg6

Black to move
16...Rg1+

Again, there was only one move that held.

17.Kf6 Ra1 18.Kf7

The pawn's advance can no longer be prevented, but it cannot yet advance far enough for victory.

18...Ra2 19.f6

Black to move
19...Kh7

This move was necessary with an important idea that is revealed in the next few moves.

20.Re7 Ra3 21.Rd7 Ra2 22.Ke6+

Black to move
22...Kg6

This move--a vital defensive resource--was only possible because of 19...Kh7. 22...Kh6 also holds, but I did not consider it as threatening the pawn should the king step away seems best.

22...Kg8 loses to a technique that is easy to learn. 23.Rd8+ Kh7 24.f7. With the rook controlling the promotion square, White's king deals with checks from the rear by marching towards Black's rook. When the checks run out, the pawn promotes.

23.Rd6 Re2 24.Kd5 Kf7

24...Rd2+ seems simpler.

25.Rd7+ Kxf6=

Exercise 9/5 proved more difficult. I needed quite a few take backs to find my way.

White to move
The position appears at least twice in ChessBase's Mega 2024. Dvoretsky references Rohde,M. -- Cramling,D., Innsbruck 1977, where Rohde was not successful in winning. 

Dvoretsky also mentions analysis of the position by Nikolay Kopaev. I am able to find this analysis in Harold van der Heijden's Endgame Study Database VI (2020), but not volume 5 of Comprehensive Chess Endings by Yuri Averbakh and Kopaev.

"White wins, but with some hard work," Dvoretsky writes (398).

Dvoretsky's Endgame Manual is indeed challenging, but it is not out of reach for a class player looking for instructive practice against the silicon beasts.


22 April 2025

When preparation meets opportunity

The expression, "luck is when preparation meets opportunity", is often credited to Lucius Annaeus Seneca the Younger (c. 4 BCE-65CE), but has not been sourced to any of his writings. Another version, credited to several golfers ("the harder I practice, the luckier I get") has been tracked by Quote Investigator, who finds the sentiment was around before any of the golfers credited had been born. The Yale Book of Quotations (2006), ed. Fred R. Shapiro offers, "Luck is the residue of design" from Sporting News (21 Feb. 1946), quoting baseball executive Branch Rickey.

Whatever, the origins of the phrase, the concept has merit. Yesterday, I faced the Budapest Gambit in a ten minute game after having spent part of Sunday reading Vassilios Kotronias, "Budapest Gambit: Repertoire for White" in Chess Informant 162, 49-59. Perhaps it was luck, then, that I was better prepared than my opponent.

Stripes,J. -- Internet Opponent (1459) [A52]
Live Chess Chess.com, 21.04.2025

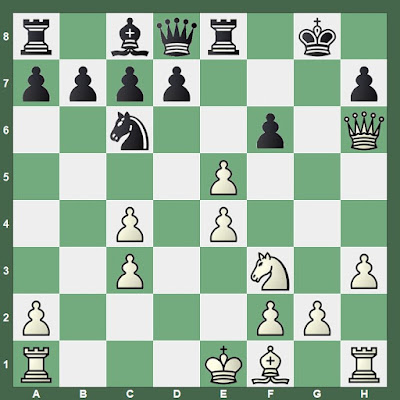
1.d4 Nf6 2.c4 e5 3.dxe5 Ng4 4.Bf4 Nc6 5.Nf3 Bb4+ 6.Nc3 Bxc3+ 7.bxc3

All so far as recommended by Vassilios Kotronias in Chess Informant 162. He offers another option at move 4 also, but Bf4 is his top choice.

Black to move

7...0-0?

Four games in CB Mega 2024

7...Qe7 is Black's normal move, which White meets with 8.Qd5 and possibly a slight advantage.

8.h3

Of course.

8...Nh6 9.e4

My move appears to be inaccurate. I considered 9.Qd2 Qe7 (I wanted to prevent 9...Nf5 but it can be met with 10.e4 [10.Nd4 is better 10...Ncxd4 11.cxd4] 10...Nh4 11.Nd4 Qe7 12.0-0-0+/=) 10.g4 d6 11.exd6 Qe4 12.dxc7 Qxc4 13.Bg2 Re8 14.Bxh6 gxh6 15.0-0 Qe6 16.Rfe1 Qe7 17.Qxh6 Qf8 18.Qxf8+ Rxf8 1-0 Anand,V (2786) -- Boffman (1517) Anand Charity sim ICC INT 2007. 

9...Re8N

9...f6 10.exf6 Qxf6 11.Bxc7 Qxc3+ 12.Nd2 with a slight advantage for White.

White to move

10.Qd2

10.Bg5! was a missed opportunity 10...f6 11.exf6 Nf7 12.Bh4 and a clear advantage for White.

10...f6?!

10...d6 11.0-0-0! (11.Bd3? Nxe5 12.Nxe5 dxe5 13.Bxh6 gxh6=) 11...dxe5 12.Qxd8 Nxd8 13.Nxe5 f6 14.Nd3 and White is somewhat better.

11.Bxh6

This move struck me as better after 10...f6, but I could have played 11.c5!

11...gxh6 12.Qxh6

Black to move

12...fxe5

12...Nxe5 was Black's last chance to put up a struggle. 13.0-0-0 Nf7 14.Qh4

13.c5! Re6? 14.Bc4+- d5 15.cxd6 cxd6 16.Bxe6+ Bxe6 17.Qxe6+ Kf8

White to move

18.0-0 Qe7 19.Qh6+ Qg7 20.Qxd6+ White won by resignation 1-0

18 April 2025

Stockfish's Curve Ball

During chess camp last week in a session ambitiously called "advanced rook endgames", I had the students choose a position from a stack of cards that were face down. These cards have 24 endgame diagrams, some of which specify the side to move. One of those they chose, I had regarded as reasonably simple. I set it up in the Fritz GUI with Stockfish 16 loaded as the main engine, and we (the students with my guidance) played it against Stockfish.

The engine defied Dvoretsky, who wrote, "Black's rook must remain passive, staying on the eighth rank" (Dvoretsky's Endgame Manual. 5th ed. [2020], 161). I explained to the students what I recalled of Dvoretsky's explanation, and drew the arrows visible in the diagram.

White to move
From my lead, the students chose the first move well.

1.Rb7 Rd8 2.Rh7

Only after struggling against the engine's surprising response did we come to understand that 2.Rg7+ is better.

2...Rd6!

3.f7 is not possible. We tried 3.Rg7+ Kf8 4.Rh7 Kg8 and realized something else was needed.
3.Re7 Kf8 confused us, although it should not have.
After 3.Rb7 Rd8, we felt that our progress was still missing something.

After several trials and error, we found the correct idea.

3.Rg7+ Kf8 4.Ra7 Rd8 5.Rh7

Black to move
Now Black must allow either the skewer or f7+ followed by the skewer.

Playing several Lucena positions against Stockfish over the past few years, I've learned that the engine often diverges from the line given in the textbook. Often this complicates the solution and the human must solve a problem.

These curve balls are why computer training is valuable.

04 April 2025

Remarkable King Pursuit

While exploring with a student some variations in a game with a dynamic imbalance yesterday, we came upon this position with Black to move.

At first it was surprising that the engine found the position equal. Then, we saw 34...Qa1+ 35.Kg2 f3+ 36.exf3 and Black forces stalemate with 36...Qg1+ (or h1).

Two lines needed more examination:

a) 35.Kh2 fxg3+ 36.Kxg3

Black to move
36...Qg1+ 37.Kf4 Qxf2+ 38.Ke5 and Black's queen should be able to continue checks until there is a repetition or the queen is captured by the king without blocking the bishop's control of h7 nor the rook's control of the g-file.

b) 36.Kxf3 Qh1+ 37.Kf4

Black to move
Here, Stockfish 16 favors 37...Qc1+, but I like the simple aesthetics of 37...Qf3+, which is easier to calculate. Two moves result in stalemate--capturing the queen with pawn or king. 38.Ke5 drops the rook and shifts the advantage to Black. That leaves 38.Kg5 and Black has a mate in two: stalemate, that is.