24 April 2019

Double Exclam!!

I thought my move was obvious, but the evaluation component on Chess.com's website asserted that the move was brilliant.

Black to move


It was a three minute blitz game from an unusual line in the French Defense. The game lifted my blitz rating to 2008.

22 April 2019

Textbook Ending: Historical Considerations

This position arose twice in Fiebig -- Tartakower, Barmen 1905. It was reached after 58...Kc8 and again after 60...Kc8, at which point the game was agreed drawn.

White to move

Historical questions arise. What were the rules in 1905 regarding draw by repetition or by triple occurrence of position? What endgame books that should be known by aspiring masters of the time explain the technique of triangulation?

Fiebig missed an elementary win that is a textbook ending. Today, it is in many textbooks, but was it as well-known more than a century ago?

In "Pawn Ending" in Edward Winter, A Chess Omnibus (2003), 42-43, this position is reached after the first move from a diagram presented there. Winter references Das Endspiel im Schach (1917) as a source, noting that the score of the game Fahrni--Alapin has not been found. Winter notes the position from Fiebig--Tartakower, and that the game appears in the Barmen tournament book. Winter's article also appears at "Edward Winter Presents: Unsolved Chess Mysteries (14)" (2007).

Wilhelm Steinitz, The Modern Chess Instructor (1889) presents the rules that had been approved by the British Chess Association and many chess congresses. "When both players persist in repeating the same moves," is given as one circumstance that produces a drawn game. There is no reference to the number of repetitions necessary. I have previously written about the development of the Fifty Move Rule at "Max Judd's Draw Claim" (2016). Perhaps a narrative concerning the development of rules regarding repetition can be found somewhere. Winter states the game was "agreed drawn" (42).

J. Berger, Theorie und Praxis der Endspiele (1890) discusses opposition in a separate section within the larger portion devoted to kings and pawns (28-34), but I do not see any reference to triangulation--neither process nor terminology. As far as I am aware, Berger's was the standard endgame book of the time.

As I was playing through Fiebig -- Tartakower, I was certain that White should be winning after Tartakower blocked a check with his rook.

White to move

The game continued:

51.Kd4 b6

Hiarcs, running tablebases, likes 51...Kc6 52.b5+ Kc7 53.Rxd6 Kxd6 54.a4+-

52.Ke5 Rxd5+ 53.Kxd5 Kc7 54.a4 a6

54...Kd7 is more stubborn

White to move

According to Hiarcs, it is checkmate in nineteen moves.

55.a5

The second best move. White wins more quickly with 55.Ke5 Kd7 56.c5 Kc6 57.cxb6 Kxb6 58.Kd6

55...bxa5 56.bxa5 Kd7 57.c5 Kc7 58.c6 Kc8

The game has reached the position at the top of the post. After seeing how the game concluded, I opened my playing software and continued from the diagram against Stockfish 10. I checkmated the engine in sixteen moves.

59.Kc4

59.Kd6 was played by Fiebig.
59.Kd4 is given by Winter from Fahrni's book.

59...Kb8 60.Kd4 Kc8 61.Kd5

The diagram at the top of the post has been reached again, but the position has changed. Now, it is Black to move.

The rest was easy.

14 April 2019

Smith-Morra Sideline

In my online blitz junk, I often play an extreme version of the Smith-Morra Gambit that takes an idea from the Danish Gambit, offering a second pawn for rapid mobilization. It is unsound. The opening is for blitz only. The regular Smith-Morra, however, can be useful in standard rated over-the-board play and even in correspondence.

Black can decline White's sacrifice in the Smith-Morra Gambit. In a blitz game last night, my opponent did that. The game proved testing for a line that had been mostly successful for me.

Stripes,J. (1997) -- Internet Opponent (2042) [B21]
Live Chess Chess.com, 13.04.2019

1.e4 c5 2.d4 cxd4 3.c3 d3!?

Black's idea seems to point out that the pawn is not well-placed on c3.

White to move

4.f4!?

My innovation, played 18 times with 14 wins and 4 losses. Although I cannot claim to be the first who has played it.

4.Bxd3 is the normal move.

4...d5!

I have not seen this move often, but in retrospect, it seems the best way to make the argument that White's line of play may be poorly thought out.

5.exd5

5.e5!?

5...Qxd5 6.Qxd3 Nf6 7.Nf3 Nc6

White to move

8.Nbd2

8.Qxd5 Nxd5 9.Bc4 Nb6 10.Bb3 Bf5 11.Be3 e6 12.Nbd2 Bd6 13.0–0–0 0–0 was drawn in 45 moves, Papp,C (2128) -- Tamas,G (2164), Hungary 1999.

8...Bf5 9.Qxd5 Nxd5 10.Nc4 e6 11.Ne3 Bc5

White to move

The engine has the game as equal and both players are making top choices. Nonetheless, White seems to lag in the mobilization of his pieces, which also lack coordination. White's king is also more vulnerable.

White's position is much more difficult to play than Black's. In blitz, that alone can be decisive.

12.Nxd5?!

12.Nxf5 is still roughly equal.

12...exd5

Black has a better game.

13.Bd2

13.b4

13...0–0 14.0–0–0 d4 15.c4 d3

Black has the upper hand.

White to move

16.b3 Ba3+ 17.Kb1 Rfd8 18.h3 h5 19.Nh4

19.g3 Be4 20.Bg2 Nd4 21.Rhf1

19...Be4 20.Rg1?

20.Nf3

Black to move

20...Bc5–+ 21.Rh1 Nb4

21...a5

22.Re1

22.Nf3

22...f5?

Black lets White back into the game.

White to move

23.Nf3

23.Nxf5 Re8 (23...Bxf5 24.Re5 and White has an edge) 24.Rxe4 Rxe4 25.a3 Nc2 26.Bxd3=

23...Nc2 24.Rd1

24.Rc1

24...Na3+ 25.Kb2 b5 26.cxb5

26.Ne5

26...Nxb5

White to move

27.Ne5? White collapses.

27.a4

27...Bd4+ 28.Kb1 Na3+ 29.Kc1 Rac8+ 0–1

White struggled the whole game to mobilize his pieces without success. Black, meanwhile, was able to consistency apply pressure. White eventually collapsed from the pressure. Despite my nearly 75% scoring percentage with 4.f4, the line cannot be recommended.

13 April 2019

Learn the Ending

As tine was running low on the clocks, I was watching the last two games finish in the second round of a youth tournament. As the tournament director, watching the clocks during a time scramble can be important. In the penultimate game, White offered a draw because he was certain that should be the result. Black wanted to play it out. A few moves later the queens were exchanged and the game was drawn. However, the result could have been different if the player with Black had studied a position that can be found in most endgame books.

White to move

White played 1.a8Q and offered a draw. Play continued 1...Qc6+ and after a few moves the kings were on b5 and b8 and the queens were on b6 and b7. Queens were exchanged.

Mark Dvoretsky, Dvoretsky's Endgame Manual has a similar position.

White to move

1.Qb3+ Ka1 2.Qd1+ Kb2 3.Qd2+

This square is where the queen needs to go. In the game from my tournament, 1...Qd7 was the equivalent move with the same idea.

3...Kb1

3...Ka1 allows 4.Qc1#

4.Kb4

Black's king already occupied the mirror of this square in the youth game.

4...a1Q 5.Kb3

Black to move

Black is in zugzwang with no safe square to move the queen without losing it or allowing checkmate.

The youth game could have continued 1...Qd7+ 2.Kb8 Kb6 and White would be in zugzwang.

12 April 2019

More on the Exchange French

Yesterday, I posed some questions concerning the position after the moves 1.e4 e6 2.d4 d5 3.exd5 exd5 4.c4. I generalized about the relative absence of games in the Exchange French in Chess Informant. However, White has options other than 4.c4. Indeed, this move is the third most popular at top levels, after 4.Nf3 and 4.Bd3. Informants 1-138 have 158 games with the ECO code C01 and 80 of these open 1.e4 e6 2.d4 d5 3.exd5 exd5. Black has tried other third moves and there are other move orders leading to Exchange-type positions, such as 1.e4 e6 2.d4 d5 3.Nc3 Nf6 4.exd5 that also reside within C01.

The mainline Exchange French begins after 1.e4 e6 2.d4 d5 3.exd5 exd5. I have had this position more than 2700 times, and not always as Black. This position appears in 80 games* that have been published in Informant.

White to move

PowerBook 2016 gives the following data (it may be time to update to PowerBook 2019).


My experience is that 4.c4 is the most dangerous, but all White moves are below White's average score across the database as a whole. If a chess player is looking for opportunities for creative play in an approximately equal position, there are several possibilities.

4.Nf3 is the most popular, and so deserves attention. In the 832 games of mine on Chess.com that have reached this position, Black has won more than White and there is a higher than average draw percentage. Usually I have been Black, but I have played both sides.

4...Nf6 is the most popular Black reply, but 4...Nc6 cuts more deeply into White's winning percentage. I've been on the Black side three times in April 2019 with two wins and a draw.

Internet Opponent (1965) -- Stripes,J. (1956) [C01]
Live Chess Chess.com, 10.04.2019

1.e4 e6 2.d4 d5 3.exd5 exd5

White has many options, including 4.Bd3, 4.c4, 4.Bf4, 4.Nc3, 4.Qf3, and the move played in the game. A few other rare moves have been played.

4.Nf3 Nc6

4...Nf6 is more popular, as is Bd6.

5.Bd3 Bd6 6.0–0

6.c3 is the mainline.

6...Nge7 7.a4 an unusual move that may have originated with this game. 7...Bf5

White to move

Black's pieces are all on squares that they know well. Often, I will play Qd7 and O-O-O, which may have been anticipated by White. This plan works best when White helps my kingside storm get moving with Bg5. With opposite-side castling, the speed of one's pawns can be decisive.

8.Na3

White preserves the option of pushing the c-pawn

8...a6 9.Re1 Qd7 10.Ne5

Black to move

Practically forces my reply.

10...Bxe5 11.dxe5

Black already has a slight advantage. White's pawn on e5 could become vulnerable, bit also interferes with White's efforts to attack.

11...0–0 12.f4 Nb4?

12...Rad8;
12...Nd4

13.Bxf5 Nxf5

13...Qxf5

14.c3

14.g4 White's phalanx of pawns will give Black trouble.

14...Nc6

Both sides have chances. The minor piece and pawn structure imbalances render this a game that should not end in a dull draw.

15.Nc2 d4 16.g4?

Two moves too late. Now, this move is an error.
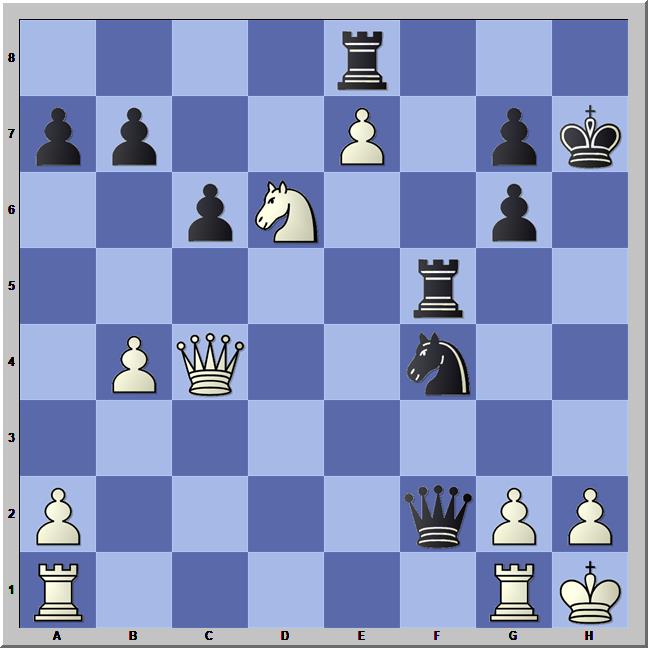
Black to move

16...Nh4 17.cxd4 Qd5

A beautiful queen outpost!

18.Re2 Nf3+?

White's resignation was the final error. The position is equal.

Black should have played 18...Nxd4 19.Nxd4 Nf3+ with a slight edge.

0–1

The French Exchange leads to open positions with opportunities for piece play. Although it has a drawish reputation, the positions do not lack complexity and opportunities for both players to err. It deserves our attention.


*This number is inflated, as sometimes a single game will appear twice in the same issue--once in the games section and also in one of the articles. Such is the case with the most recent game through Informant 138, for example. Safarli,E.--Huzman,A., Porto Carras 2018 Informant 138/114 appears in the games section and also with verbal annotations in an article on the European Club Cup.

11 April 2019

Exchange French

Black to move

This position, which I have had in more than 900 games, appears in only twelve games in Chess Informant through volume 138. Is the position so theoretically dull that the editors of Informant lack interest in the position? Is it generally avoided by Grandmasters because Black too easily equalizes?

The games that have made it into Informant include some long middle games with dynamic piece play and instructive endings. What else should we want from an opening?

I think that Black should play Nf6 and Bb4 on the next two moves. It is less clear to me whether the sequence matters. In ChessBase's PowerGames database, Nf6 is played first more than 80% of the time.

08 April 2019

Secure the Advantage

In a blitz game late last night, I blundered away my queen and spoiled a nice position. Nonetheless, I went on to win the game. This morning, I struggled to find where my opponent went wrong. The fatal error is not difficult to determine, but what would have secured the win?

Black to move
29...Qxb2??

29...g6 30.Bf1–+

30.Bh5+ g6 31.Bxg6+??

31.Qxb2 Re3 32.Be2+-

Even after this error, I think White has the better game.

31...hxg6 32.Qxb2 Re3 33.Bf2

33.Qb6 is no good because 33...Be4–+

33...Re4

White to move

34.g3?? d3-+

Black went on to win.

02 April 2019

Why Forks Matter

Inherent in all chess tactics are relationships between pieces. A White rook on e1 can attack a Black pawn on e6 if there are no pieces in the way. This relationship is one of offensive contact.* If there is a king shielded behind the pawn on e7 or e8 (a defensive contact), the pawn is unable to capture a White piece standing on f5 or d5. This restrictive contact is called a pin.

If two Black pieces sit on the sixth rank with three squares between them, they are vulnerable to attack from a White rook that can reach the sixth rank. These two enemy pieces can be attacked in a manner we call a pin, a skewer, or even a fork. The rook can attack both because they are on the same line. These attacks are the relationship I created in the first three exercises for my Essential Tactics worksheets.


Such tactical ideas as pins, skewers, and discoveries take place along a single line—rank, file, or diagonal. A fork also can take place along such a line, but forks are more commonly understood to take place along multiple lines. In this exercise from Essential Tactics, for instance, the correct move places the White king in offensive contact with the Black knight along a diagonal and with the Black bishop along a file.

White to move

Consider this game from the forgotten book, A Treatise on the Game of Chess (1808) by J. H. Sarratt (12-15). The notes are by Sarratt, and the book may be found at Google Books. At three critical moments in this illustrative game, White employs a fork. In the third instance, the fork attacks a king and a target square that must be occupied to put a stop to Black's counterplay.

1.e4 e5 2.Bc4 Bc5 3.c3 Nf6

This move, though very generally played, even by good players, is certainly a bad move.

4.d4 exd4

If 4...Bd6 White would win a piece, as will be shown in a Back-game.

5.e5 Ne4

Instead of this move the Black might play the Queen to his King's second square; or his Queen's Pawn two moves; but you would nevertheless have the best of the game, as will be demonstrated in two Back-games beginning at the fifth move of the Black.

5...Qe7;
5...d5

White to move

6.Bxf7+

Instead of this move, you might play your King's Bishop to the adversary's Queen's fourth square; but he would then sacrifice his knight for three Pawns, as will be shown in the second book.

6...Kxf7 7.Qf3+ Nf6 8.exf6 Qxf6

White to move

9.Qh5+

It seems that if you were to give check at the adv. Queen's fourth square, you would likewise win the Bishop; but he would cover the check with his Queen at his king's third square, and giving you check at the same time, you would be compelled to exchange queens.

9.Qd5+ Qe6+ 10.Qxe6+

9...Qg6 10.Qxc5 Qxg2

White to move

11.Qf5+ Ke8 12.Qf3+- and you will win the game, whether the Black exchange Queens or not.

Modern Grandmaster Play

On the way to winning the US Championship, which concluded Sunday, Hikaru Nakamura had this position with the Black pieces against Ray Robson.

Black to move

29...Qc4

Nakamura forks both rooks, although they easily protect each other. Nonetheless, this move brings the queen to a better square for the assault against the White king.

30.Ref6 a3 31.bxa3 bxa3 32.Qxa3

Black to move

Nakamura must have had this position in mind when he played 29...Qc4. White's move 29 that led to a simple fork of rook was to capture a bishop on e5. Nakumura now initiates a combination that recovers the lost minor piece with interest.

32...Rxc1+ 33.Rxc1 Qxe4+

Black is currently down a rook, but White's moves are forced.

34.Kb2 Qe5+

Another fork.

White to move

35.Rc3 Rb8+ 36.Kc2 Qxf6

With an extra pawn and a less vulnerable king, Black had the better endgame. He used a series of checks to win another pawn and force the rooks off the board.


*See Yuri Averbakh, Chess Tactics for Advanced Players (1992) for definitions of contacts as the foundation of chess tactics.

01 April 2019

Blitz Woes

I have blitz binges. As the addict returns to his or her drug to escape life's stresses, I play blitz for hours on end. Losses drive me to play more, but I can sometimes quit after a win.

The past ten days or so, I have been highly motivated.