Showing posts with label square of the pawn. Show all posts

25 October 2024

Poor Decisions

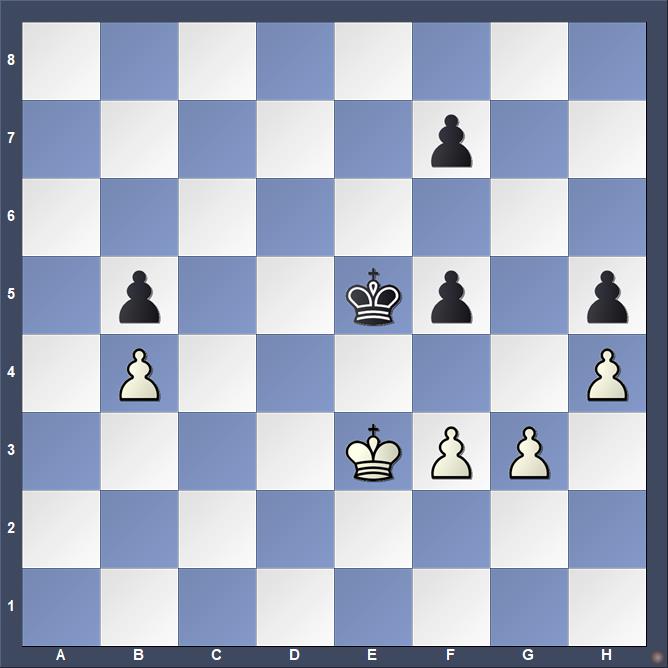
My first error was the decision to play chess on my phone while walking my dog. My sunglasses made it more difficult to see the phone's screen clearly in addition to other distractions. My opponent, rated 600 lower, held his own until I blundered from this position. In fact, there were several blunders as the advantage switched back and forth. 

White to move
58.Nc6??

58.Nb5 is how White stops the e-pawn. To my relief, this blunder was the game's second to the last.

58...e2?? Nd4+ and White has an unstoppable pawn.

What was the move Black should have played?

Knowledge of the square of the pawn and of the floating square is useful.

20 September 2023

Speed Kills

While playing this ending, I first thought that we had reached a simple drawn position. Then, my opponent erred. I sensed (correctly) that I was now winning, but managed to throw it away. Later analysis showed that it should have been drawn until my error gave my opponent a winning opportunity, but perhaps not an easy one to find.

Black to move
41...f6??

I rejected hastily 41...f4+, although it should have been clear to me that 42.gxf4+ Kf5 43.Kd4 Kxf4 leads to a pawn race where both players promote on the same move--a draw.

Stepping back with 41...Ke6 also allows Black to regain the opposition if White tries to advance his king.

42.Kd3

My first clue that I had missed something instructive in this ending was the website's game analysis calling this move a miss. Using the retry function, I found the idea, but further analysis showed that it was more intricate than I then thought.

White's winning idea is to transfer the king to h3, then create a passed pawn.

42.Kf2! Kd5 43.Kg2

Black to move
Analysis diagram
43...Ke5

If Black tries 43...Kc4, White's breakthrough takes place instantly for Black's king cannot get back into the square of the pawn. The pawn on f6 blocks the diagonal route after 44.g4 fxg4 45.fxg4 Kd4 46.gxh5.

44.Kh3

Without some calculation, I assumed that Black's b-pawn would promote before White's kingside pawns could break through, but the variation just above shows that is not true. Instead. Black's king must stay on the kingside. This also fails.

a) 44...Ke6 45.g4! f4 46.gxh5 Kf5 47.h6

Black to move
Analysis diagram
47...Kg6 48.Kg4 Kxh6 49.h5 f5+ 50.Kxf4 Kxh5 51.Kxf5+-

b) 44...f4 45.g4 f5 46.g5 and now Black's king is tied down to stopping the passed g-pawn allowing White's king to run to the b-file.

42...Kd5

I was thinking that we would shuffle our kings back and forth and agree to a draw.

43.g4??

Black to move
43...fxg4 44.fxg4 hxg4 45.h5 f5??

I hallucinated that my king could stay in the square.

45...Ke6 leads to an easy win.
45...g3 also leaves Black with a decisive advantage

46.h6+-

I blitzed out a few more moves because my opponent was low on time, but resigned when it became clear that my opponent would finish easily with the 20 seconds or so remaining.


23 April 2023

Fails

It seems that I pick up The Manual of Chess Combinations, vol. 2 by Sergey Ivashchenko once every other week to work a page of exercises. A few days ago, half a page occupied part of my morning. I solved three successfully. This morning, the fourth one on the page did not present difficulty, but the last two did. I also managed to err in the sixth exercise on each of the the next two pages.

Exercise 144 struck me as a study in corresponding squares on first glance, but I gave too little attention to the simplicity of Black's ability to gain and maintain the opposition. Had I considered the possibility of a sacrificial breakthrough, I might have more quickly perceived the floating square idea. I spent some time teaching the floating square to a couple of students last week and should have seen it.

White to move
1.Kf2 (or any other king move) fails. 1...gxh4 2.gxh4 Kg6 3.Ke3 Kf5 4.Kf3 Ke5 and Black can shuffle the king back and forth.

Instead, 1.g4! wins 1...hxg4 2.h5 (also 2.d6). 

Before that one, I thought I had correctly solved number 143, but had also overlooked something simple.

White to move
I tried 1.Kg5, overlooking that I had nothing after 1...e6 2.Kf6 Ke8 3.Kg7 Ke7 and somehow I had hallucinated there being possible an outflanking maneuver. After 1.Kg7 Ke8 2.e6! fxe6 3.Kg8 Kd8 4.Kf8 Kd7 5.Kf7 Kd6 6.Ke8, White has successfully outflanked the Black king.

Number 150 was familiar and I instantly knew the correct answer, but could not perceive the reason the rook had to move to d2 instead of d1, so I tried Rd1 against Stockfush. Again, simple opposition gives Black a draw.

White to move
1.Rd2! wins 1...d4 2.Rd1! Kd5 3.Kd7 Ke4 4.Kc6 d3 5.Kc5 Ke3 6.Kc4 d2 7.Kc3 and the rook captures the pawn on the next move. After 1.Rd1 d4 2.Kd7 Kd5, White can try 3.Rd2 Kc4 4.Ke6 Kc3 5.Rd1 d3 6.Ke5 Kc2 and the rook must be given up for the pawn.

My error in number 156 stemmed from failing to recognize the possibility of Black achieving a Philidor position.

White to move
Black got a Philidor-type position after 1.Kc4 Rg8 2.Kc5 Rg1 3.dxe6 Rc1+.

White wins easily either with 1.dxe6 fxe6 2.Ra7 Rf8 3.Ra8+ Kd7 4.Rxf8 or with 1.Ra7 straight away.


20 December 2021

More Notes on Berger

Johann Berger, Theorie und Praxis der Endspiele (1890) systematically examines practical chess endings in a manner that ushered in the modern theory of the endgame. The book's availability has been enhanced by Google Books.

During my reading yesterday, some underpromotion exercises captured my interest. Berger credits Carl Ferdinand von Jaenisch as the composer. I played them out against Stockfish on my iPad and found the second one required some calculation to get the knight to its proper posting.

White to move
1.Rxg5+ Rxg5 2.fxg5 h2 3.g6 Kh3 4.g7 h4

White to move
White must underpromote to a bishop or knight to avoid stalemate. In this instance, a bishop is the better choice, but a knight can win.

Berger's second exercise from Jaenisch differs in the placement of two pawns.

White to move
1.Rxg5+ Rxg5 2.fxg5 h2 3.g6 Kh3 4.g7 h4

Now, while a bishop does not stalemate, it also cannot win. White must play 5.g8N.

5...Kg4

White to move
Berger's solution continues with 6.Nf6+. I played 6.Ne7, and the tablebases favor 6.Kxh2.

Preceding these studies, Berger offers a brief explanation of the square of the pawn. Following these, is a section on the opposition with several illustrative positions, culminating in this important one from Giambattista Lolli, published in 1763.

White/Black to move
White to move wins; Black to move draws. For some reason, I found the draw hard to believe, but I've practiced the position against students many times since learning it more than ten years ago. Winning with White to move is one one of my requirements for the Bishop Award in my Scholastic Chess Awards.

21 February 2021

Building a Lesson

A Partial DVD Review

I was stunned at seeing the number of instructive themes that Karsten Müller was able to extract from a short endgame played by Jose R. Capablanca as part of a simul. The lesson appears as part of the Fritz Trainer DVD, Master Class 04: Jose Raul Capablanca (2015). Then tracking down Müller's reference to Edward Winter revealed a fascinating history of the position as well, including some debate within Chess Notes that spanned more than a decade (see Edward Winter, "Capablanca v. Kalantarov", Chess Notes [updated 17 December 2019]).

Winter's story begins in 1988 with Chess Notes 1715. Ken Neat brought to Winter's attention a position that appeared in Isaak Linder, and Vladimir Linder, Kapablanka v Rossii (1988).* Linder and Linder reference an account by Peter Romanovsky that was published in Shakhmaty v SSSR (1959). Winter published Neat's translation. One of the later additions to Winter's notes present Romanovsky's entire article in three images. Those who read Russian might enjoy it.

Note 1715 inspired Rene Olthof to use the position in one of his training sessions, and he then sent in a note, which Winter published. Olthof found the position "nothing special". The first two notes were republished in Winter, Chess Explorations (1996) under the title, "Knight Ending" (25-26).

Twelve years later, Müller offered a refutation of Olthof's idea (Chess Notes 2402). As noted in the sequence of notes published by Winter over several decades and collated in the article, "Capablanca v. Kalantarov", Müller has published his analysis in The Chess Cafe Puzzle Book (2004). Encyclopedia of Chess Endings, vol. 5 (1993) also contains the position and some analysis, but not a key refutation of an error. Pal Benko also analyzed the ending in two issues of Chess Life.

The analysis begins with this position. We know from Winter that Capablanca's opponent was Kalantarov, about whom little is known, and that it was part of a thirty board simul in St. Petersburg in 1913. Capablanca scored +26-3=3. Romanovsky's story suggests that he and others were assisting Kalantarov.

White to move

The game concluded 46.Kf7 Ng5+ 47.Nxg5 fxg5 48.g4 Kh7 49.h4 Kh6 50.Kf6 Kh7 51.h5 a5 52.Ke5.

White wins because he has a protected passed pawn and his king is in the square of Black's passed pawn.

Müller's Diagram, Black to Move

Müller carries the analysis another twelve moves to show how White employs triangulation (although he omits this term) to regain the opposition and reach the point where outflanking will win Black's g-pawn.

Along the way, he presents several unplayed variations that lead to checkmate, even in one case allowing Black to promote first, but white plays a check, promotes with check, and then has the option of skewering the king to pick up Black's queen, or checkmate (the better option, of course).

White to move

After the move that Encyclopedia of Chess Endings missed, White also gets a supported passed pawn and stops Black's a-pawn. However, in this case, Black is able to maintain the distant opposition to keep the White king on the queenside, while at the same time staying in the square of the passed h-pawn.

Müller's Diagram, White to Move

Had Capablanca missed 48.g4, he could have lost the game because Black's outside passed pawn takes his king too far away and Black has time to round up White's pawns.

White to move

The DVD contains Müller's brief historical background, the note that with correct play Black should have drawn the game, and then finding 48.g4 is the first exercise. I made the same error as Olthof because I underestimated the complexity of the position. Following that error, however, I was able to play through the lesson and choose the correct answers. Capablanca's entire idea beginning with the surprising 46.Kf7 is an instructive breakthrough idea.

Inn addition to video lessons on the endgame by Müller, the DVD includes video lessons on strategy by Mihail Marin, tactics by Oliver Reeh, and openings by Niclas Huschenbeth. In addition to the videos, there are 103 games with training questions, and 14 endgames analyzed by Marin. The collection is enhanced by a biography of Capablanca with links to important games, and a database of 1223 Capablanca games. There are also opening trees for White and Black based on Capablanca's play.


*An English edition was published in 2009 under the title, Jose Raul Capablanca: Third World Chess Champion.


04 December 2020

Textbook Ending

 In today's Morning Membership tournament on Chess.com, two players found themselves in a difficult pawn ending with under a minute remaining. The time control was game in five minutes with a two second increment (5+2). White had 18.5 seconds and Black had 38 when Chris started showing the game on Twitch. Chris Bird is the tournament director and streams these weekly events.


Both players shuffled their kings back and forth until a repetition occurred. When players are premoving, as they seemed to be doing, draw offers are often refused even as they are made. It was not clear from Chris's discussion whether he knew that White had a winning position.

In the screenshot, White has just played 51.Kd4.

There was an alternative.

51.Kb5 wins.

After 51.Kb5!

This move can be frightening with less than twenty seconds left, but it is the correct move. White has stepped out of the square of Black's pawn. If White fails to promote first, or set up a checkmate, Black will also promote.

After 51...Kc8, White has two ways to proceed.

52. Kc6, or 52.a6. I played the latter against Stockfish 11, which replied 52...e3.

White to move

Now, only one move wins for White. All others lose.

After 53.b6+, 53...Kc7! leaves White lost. However, 53...Kb8 allows 54.Kb6 and 55.a7#. In one of the textbook lines beginning with 51...Kb8, Black promotes the pawn just before getting checkmated.

53.a6 allows 53...Kb7 and White can make no further progress, while Black's e-pawn cannot be stopped.

53.Kc6! e2 54.b7+

Black to move

54...Kb8 55.Kb6 e1Q Black promotes first, but White checkmates with pawns. Stockfish chose a longer checkmate.

54...Kd8 55.b8Q+ Ke7 56.Qe5+ and White wins.

While watching the Twitch stream, I saw a familiar pattern. After the tournament, I out that my belief that White was winning was indeed correct. Although as a practical matter, with less that twenty seconds remaining, I, too, might have taken the draw.

The textbook position appears in Dvoretsky's Endgame Manual. Consequently, it is a position that I have played out several times with my students (see "Pawn Ending Flash Cards").

White to move

I know the technique through training with positions from Dvoretsky. Likely other books have the position as well, and it appears in Harold van der Heiden's Endgame Study Database. Heiden credits Reuben Fine, Basic Chess Endings (1941), while Dvoretsky credits the nineteenth century composers J. Kling and B. Horwitz.*

In any case, the first critical position is reached after the moves:

1.Kd4 Kg4 2.h4 Kh5 3.Ke3 Kg4 4.Ke4 Kh5 5.Kf4 Kg6 6.g4 Kg7

White to move

7.g5 is a mistake. White can move the king, but the way forward is 7.h5!

7...Kh6 8.Kf3

Heiden has 8.Ke4 here. Dvoretsky's solution is three moves longer, so seems to offer better defense by Black. Both 8.Kf3 and 8.Ke4 have the same number of moves to mate, according to my chess engine.

Dvoretsky points out the importance of triangulation for White.

8...Kg5 9.Ke4 Kh6 10.Kf4 Kh7 11.g5 Kg7 12.g6 (12.h6 loses) 12...Kf6 13.Ke4 Kg7 14.Kf3 Kf6 15.Kf4 Kg7

White to move

Now, White's confidence comes into play, as it is time to leave the square of Black's passed pawn.

16.Kg5 c3 17.h6+ Kg8 18.Kf6 (see the critical Kc6 in my analysis of what might have been above).

18...c2 (so close to becoming a queen!)

19.h7+ Kh8 

White to move

20.Kf7 c1Q

Black promotes, but White will promote with check.

21.g7+ Kxh7 22.g8Q+ Kh6 23.Qg6# 

This ending is worthy of study. Perhaps if your nerves are calm, you can win with a quarter minute and a two second increment should you find yourself is a comparable position.


*Fine, on my reading presents a similar position that is a draw. He does mention winning chances, though, if the pawns on the left are another row to the right of the position illustrated here. There seems some room for some historical research.

25 May 2019

King Position

I am working my way through pawn endings that I have played over the past twenty years that ended drawn (see "Four on Four"). Some of these are completely lost for one player who was saved by the clock. Many of them are blown wins by one side or the other. Several games reveal that both players threw away a win, as yesterday's "More Endgame Errors".

Of course, these games nearly all come from blitz games played online. By the time a pawn ending is reached, the players may have only a few seconds remaining. Even so, better instincts can be trained, leading to better endings when one must play instantly.

This morning's review turned up an interesting position with both sides possessing pawn majorities, but White's king is better placed.

Stripes,J -- Internet Opponent [D32]
rated blitz match  freechess.org, 17.10.2005

White to move

33.a4+-

Seems like the wrong pawn, but ...

33...Kg7

33...a5 34.Kf3 Kg7 35.b4 axb4 36.Ke2 Kf7 37.a5 Black's king is outside the square.

34.b4 Kf7

White to move

35.a5??

35.Kf3!+- Ke7 36.Ke4 Kd6 37.Kd4 a6 38.b5

Black to move
Analysis diagram

38...a5

(38...axb5 39.axb5 Kc7 40.Kd5)

39.f4 Kc7

(39...g5 40.fxg5 fxg5 41.Ke4)

40.Kc5 Kd7 41.Kd5 Kc7 42.Ke6 g5 43.fxg5 fxg5 44.Kf5+-

35...Ke6–+

Black, nonethless, managed to fail, too. The game was drawn at move 61.

24 May 2019

More Endgame Errors

Working my way through more than 200 drawn pawn endgames is revealing how poor my endgame skills were fifteen to twenty years ago. I bought Dvoretsky's Endgame Manual in 2003 or 2004, and that was after training against Hiarcs or Fritz with 100 pawn endgames downloaded from a website with terrific tactics and ending PDFs.

I plan to develop training material for my students from these games.

White to move

Internet Opponent -- Stripes,J. [A46]
ICC 5 0 Internet Chess Club, 24.11.2003

37.Kd2

37.Ke3?! a5

     (37...g5 38.g4?? fxg4 39.hxg4 h4 40.Kxe4 a5 and Black has the upper hand)

38.g3 a4 39.Kd2 g5 and Black has the upper hand

37.h4=

37...f4

37...g5 and Black has the upper hand

38.b3+ Kd5

White to move

39.a3??

39.h4 is the only move that holds the draw.

39...g5–+

39...h4–+

Did I know that the game had suddenly turned in my favor?

40.Ke2 a5 41.Kd2 Kc5 42.Kc2

Black to move

42...b4??

42...g4 shows a grasp of the right idea.

43.axb4+ axb4 44.cxb4+??

44.c4=
44.g4=

44...Kxb4–+ 45.Kb2 g4 46.hxg4 hxg4 47.Kc2

Black to move

47...f3??

There is a breaktrough idea based on the square of the pawn. Either I was extremely harried because of the clock, or simply lacked understanding of this elementary endgame concept.

47...e3 48.fxe3 f3 49.gxf3 g3 and the pawn will promote.

47...Ka3 48.Kc3 e3 49.f3 gxf3 50.gxf3 e2 51.Kd2 Kxb3 52.Ke1 Kc2 53.Kxe2 Kc3 54.Ke1 Kd3-+

48.gxf3 exf3 49.Kd2= Kxb3 50.Ke3 Kc4 51.Kf4 Kd4 52.Kxg4 Ke4 53.Kg3


Black to move

53...Ke5

The only move, but at least at this point in my life, I had an understanding of the opposition.

54.Kxf3 Kf5= 

Black was stalemated on move 73


10 December 2018

One by Reti

This endgame composition by Richard Reti employs the same idea as his most famous one.

White to move

08 September 2018

Floating Square

This position occurred in yesterday's tactics training. I solved it quickly because it is elementary. However, the 51.1% pass rate suggests that not everyone finds it so. I post it to remember to use it with my students.

White to move

30 September 2016

Learning Old Ideas Anew

Games played by others are a source for ideas in one's own games. That is why many chess players go through hundreds of games month after month. With enough source material, some ideas should prove useful. Sometimes new games offer reinforcing lessons on old ideas.

This position was reached in Padeiro -- Rico, Lisbon 2015. The game was played in the Portuguese Championship. I found the game through a search of my database for positions with Black hanging pawns on c5 and d5. This search was inspired by a video on Chess.com: Ivan Sokolov, "Karjakin's Winning Strategy: Openings Approach." Karjakin had five games with this pawn structure in the Candidates Tournament, four as Black, and had a +1 score through these five games. Sokolov showed the opening and middlegame phase of Karjakin -- Nakamura.

White to move

Padeiro,Jose Joao Tato (2293) -- Rego,Pedro Filipe (2223) [E14]
POR-ch Lisbon (3), 14.09.2015

Black's hanging pawns on c5 and d5 drew me to this game.

31.Rxc5

White temporarily goes ahead a pawn, but Black's little combination restores the material balance.

31...Qh3+ 32.Kxh3 Nxf2+ 33.Kg2 Nxd3 34.Rc7

The position appears equal and material remains balanced. Both players have an isolated central pawn. Bothy have a majority on one side of the board.

34...a6

34...Re8 leads to a draw, according to Stockfish 7 35.Rxa7 Rxe3 36.Nd4 Re4 37.Nf5 Re5

35.Nd4 Re8

White was threatening to win a pawn with 35...Ne5 36.Rxg7+ Kxg7 37.Ne6+ Kf7 38.Nxd8+ Ke7 39.Nb7

36.Nf5 Re5 37.g4

37.Nxg7 Rxe3 38.Nh5 Re6 39.Rd7 might be better.

37...g6 38.Nh6+

How far did White calculate?

Black to move

38...Kf8 39.Kf3

I might be inclined to try something like 39.Rf7+ Ke8 40.Rxh7 Rxe3 41.Ra7

39...Re7 40.Rc3 Ne5+ 41.Kf4 Kg7

The knight appears trapped.

42.g5 fxg5+ 43.Kxg5 Nf3+

Black gets all White's kingside pawns.

44.Kf4 Nxh2 45.Kg3 Nf1+ 46.Kf2 Nxe3 47.Rxe3

Black to move

47...Rxe3?

It seems simple enough to trade into a 5-2 pawn ending, but White's queenside pawns are powerful. Indeed, they are decisive because the Black king is too far from them. Black's only chance was to leave the rook on the board and let the knight escape.

47...Rc7 was necessary, when after 48.Ng4, White's slight material advantage might be insufficient for the win.

The power of an outside passed pawn, or a majority that can create one, is a lesson that most players learn early in their chess development.

48.Kxe3 Kxh6

48...a5 49.a4 Kxh6 50.b4 axb4 51.a5+-
48...Kf6 49.Kd4 Ke6 50.b4 Kd6 51.a4 Ke6 52.Nf7 Kxf7 53.b5 axb5 (53...Ke7 54.bxa6) 54.a5+-

49.b4

49.a4 is also winning.

49...Kg5 50.a4 h5 51.b5 axb5 52.axb5 h4 53.b6 d4+ 54.Kf3 d3 55.b7 1–0

24 June 2016

Rule of the Square

Earlier this week, I taught a class called "Six Most Important Pawn Endings" in Inland Chess Academy's June chess camp. I sought to highlight six principles that occur with some frequency. The rule of the square, also called the square of the pawn, was one of these principles. The basic illustrative position is presented in my post "Simple to Complex" (June 2012). There is further discussion in "Square of the Pawn" (January 2014).


In the camp, I also presented an illustrative position from a recent online blitz game where an ill-advised capture transformed a simple draw into a simple win for the opponent.

White to move

Despite an extra pawn, Black can make no progress without help. Almost any move here holds the draw. However, my opponent played the inexplicable 57.Rxg5?? Perhaps he was frustrated that I was playing on in a dead draw after he had offered a draw.

57...Rb6+ 58.Kf5 Rb5+ 59.Kf4 Rxg5 60.Kxg5

White's king is outside the square.

Black to move

61...a5-+.

Today, in a 15 10 game online, a different opponent missed a draw through failure to recognize the rule of the square.

White to move

I played 28.h4 because creation of a passed h-pawn seemed my best chance for advantage in this opposite color bishops ending. As Black's kingside pawns are on light squares, the bishop has difficulty stopping the pawn. Indeed, a few seconds of calculation confirmed that Black's bishop will fail.

28...Be8?

28...Kd7 or Kd8 stops the future passed pawn by moving into the square.

29.f5 gxf5?

29...exf5 30.gxf5 Kd7 should hold.

30.gxh5??

30.h5+-

30...exf5 31.Kf4 Bd7?

31...Kd7 was still possible

32.h5+-

Black to move

Perhaps my opponent saw this position a few moves back and found a way for his bishop to cover h8.

32...f6 33.exf6

I spent over one minute on this move. It was clear that the bishop cannot stop both pawns, but the king is in the square of the f-pawn. Alas for Black, the tempi that must be spent by the bishop leave the king unable to participate.

33.h6 was sufficient, however.

33...Be6 34.h6 Bg8 35.f7 1-0

With an overworked bishop, my opponent resigned.

10 May 2015

The Crooked Path

Most chess players are familiar with a famous pawn ending composed by Richard Reti in 1921. The Black king is in the square of White's pawn, but White's king is not in the square of Black's h-pawn. Nonetheless, White is able to draw by moving the king in a manner than both chases the enemy pawn and threatens to assist his own.

White to move

1.Kg7 h4 2.Kf6 Kb6 3.Ke5

If Black pushes the pawn, then White plays Kd6, supporting promotion of the c-pawn. If Black captures the pawn, then the White king enters the square of the pawn.

A similar idea is presented from a 1947 study by Ladislav Prokeš in Dvoretsky's Endgame Manual (2003).

White to move

White's actions towards support of the a-pawn creates threats that permit the king to reach c6 before Black plays h7-h5. Both pawns are stopped. Here Black has less choice because White queens first and the queen controls Black's promotion square.

1.Kc8 Kc6 2.Kb8 Kb5 3.Kb7 Kxa5 4.Kc6

The third position comes about from play against a computer from an ending that occurred in a game played by Paul Morphy.

White to move

1.Kxf4 draws easily. However, a single careless move here produces another instance of a king able to both support its passed pawn and deal with threats on the other side of the board.

1.Kxh4?? Ke5 2.Kg4 Ke4 49.a3 f3-+

If 2.Kh3 Kd4 49.Kg2 Kc3 and White will stop the f-pawn, but Black's a-pawn will promote.

31 January 2014

Square of the Pawn

A correspondence game that finished yesterday offered a few positions that illustrate well the square of the pawn, an important elementary pawn ending concept. I have previously discussed this concept in "Simple to Complex" (June 2012).

Yesterday's finish ended a game full of gross errors. In the beginning I overestimated my attack and let my opponent gain a rook. My attack ran aground and I was hopelessly lost. My faint hope of some counterplay was underestimated by my opponent and suddenly I seemed to have compensation for the rook. After mostly finding a series of strong moves, I exchanged into a queen and pawn ending where I had more pawns.

I captured the wrong enemy pawn and gave up a few of my own. We reached the position in the first diagram.

White to move
After 63...Kg7
With four pawns to three, I would like the queens off the board. However, forcing the exchange would be an error here as my king is too far away to stop Black's h-pawn.

Chess By Post, the app on which this game was played, offers an analysis board that lets players work out whether the king could stop the pawn. Of course, counting is easy enough even without such assistance. But even counting is unnecessary.

Rather, I imagined the exchange of queens on b2, thrust the h-pawn forward, and in my mind drew a diagonal arrow forward from the pawn to the first rank. From that arrow, two more arrows complete a triangle.

White to move
Hypothetical Position
My king is not able to step into any square of the triangle. This triangle comprises half of the square of the pawn--the space that the defending king must be able to occupy in order to stop the pawn. The diagonal arrow, resulting triangle, and derived square (two triangles) allow a player to quickly perceive by geometric observation, rather than calculation, whether a pawn may be stopped.

I played 64.Qc2 and the game continued.

64...Qb6

Black could have played 64...h5 with a likely continuation 65.Qe2 h4 66.Qg2 h3! 67.Qxh3 Qd3+ and Black forces a draw by repetition.

65.Qd3 Qc7??

White to move
After 65...Qc7??
Now I am able to force an exchange of queens with my king one square closer to the h-file.

66.Qc3+ Qxc3 67.Kxc3 Kf6

Black could try 67...h5, but my king will enter the square.

White to move
Hypothetical Position
White's king is able to step into the triangle. The pawn may still promote on h1, but the White king will stand on g2 when it does. At that point, White's queenside majority assures the win (see "Fox in the Chicken Coop" [July 2013]).

My opponent opted for a different course.

67...Kf6 68.Kd4 h5

My king is already in the square.

69.b5 h4

White to move
After 69...h4
70.Ke3

My king was forced to step into the square.

70...g5 71.a4 Ke6 72.a5 Kd6


Breakthrough

White to move
After 72...Kd6
White has several ways to win, but I like the manner than I chose.

73.e5! Kxe5

Black might have tried 73...Kc7, leading to 74.e6 Kd6 75.b6 axb6 76.axb6

Black to move
Hypothetical Position
In this hypothetical position, Black's king is in the square of both pawns until each advances another square. Capturing the e-pawn removes the defending king from the square of the b-pawn. This floating square is a win for White.

74.b6 axb6

White to move

75.a6! 1-0

75.axb6?? loses because the Black king stops all White's threats. He enters the square of White's passed pawn with 75...Kd6.

Black resigned.